Neretva Bread Maker Manual⁚ A Comprehensive Guide
This comprehensive guide will walk you through every aspect of using your Neretva Bread Maker, from preparing ingredients to troubleshooting common issues․ We’ll cover key features, benefits, detailed step-by-step instructions, cleaning and maintenance tips, and even provide resources for finding additional information․
Introduction
Welcome to the world of freshly baked bread made easy! The Neretva Bread Maker is a versatile kitchen appliance designed to simplify the bread-making process, allowing you to enjoy delicious, homemade loaves without the hassle of traditional baking methods․ This manual serves as your guide to understanding and utilizing all the features and functions of your Neretva Bread Maker․
Whether you’re a seasoned baker or a novice in the kitchen, this manual will provide you with the necessary information to confidently create a variety of breads, from classic white loaves to more adventurous options like gluten-free and sourdough․ We’ll cover everything from preparing ingredients to selecting the appropriate baking program and setting the desired loaf size and crust color․
With its user-friendly design and comprehensive instructions, the Neretva Bread Maker empowers you to experiment with different flavors, textures, and recipes, unlocking a world of baking possibilities right in your own home․
Key Features and Benefits
The Neretva Bread Maker is packed with features designed to make baking bread a breeze․ Its versatility allows you to create a wide range of bread types, from classic white loaves to gluten-free options, sourdough, and even pizza dough․ With multiple settings and customizable options, you have complete control over the baking process to achieve your desired results․
One of the standout features of the Neretva Bread Maker is its dual heater system, which ensures even heating and a perfectly baked loaf every time․ The nonstick ceramic pan makes for easy cleanup, while the automatic nut dispenser adds convenience and allows for effortless incorporation of additional ingredients․ The large LED display provides clear and intuitive information about the selected program and progress of the baking cycle․
Beyond its functionality, the Neretva Bread Maker offers several key benefits․ The convenience of having freshly baked bread readily available in your own kitchen is a major advantage․ The ability to customize recipes and experiment with different ingredients allows for endless possibilities, catering to your specific dietary needs and preferences․ The Neretva Bread Maker is a practical and enjoyable addition to any kitchen, making it a perfect choice for bread enthusiasts of all levels․
Using the Neretva Bread Maker
The Neretva Bread Maker is incredibly user-friendly, allowing you to create delicious homemade bread with minimal effort․ The intuitive control panel and clear instructions make the baking process straightforward, even for beginners․ The machine automatically handles the mixing, kneading, proving, and baking, leaving you free to focus on other tasks․
To get started, simply gather your ingredients and follow the steps outlined in the recipe book that comes with the Neretva Bread Maker․ The machine features a variety of pre-programmed settings for different bread types, allowing you to choose from classic white bread, whole wheat, gluten-free, sourdough, and more․ You can also customize the settings to adjust the loaf size, crust color, and baking time to your liking․
The Neretva Bread Maker’s automatic nut dispenser is a convenient feature, allowing you to add ingredients like nuts, seeds, or dried fruit at the appropriate time during the baking cycle․ The machine’s 15-hour delay timer enables you to set it in advance and wake up to the delightful aroma of freshly baked bread, ready to enjoy for breakfast or as a snack․
Step 1⁚ Preparing the Ingredients
Before you begin baking, it’s crucial to prepare your ingredients properly․ Start by measuring all the ingredients accurately using the measuring cups and spoons provided with your Neretva Bread Maker․ The accuracy of your measurements will significantly impact the final result․ For dry ingredients like flour, sugar, and salt, use the spoon-and-level method to ensure a precise measurement․ Fill the measuring cup with a spoon and then level it off with the back of a knife or spatula․
Always use fresh yeast for the best results․ If you’re using active dry yeast, dissolve it in warm water before adding it to the other ingredients․ This will help activate the yeast and ensure proper fermentation․ For liquid ingredients, use a liquid measuring cup to ensure accuracy․ Remember that the temperature of your ingredients can also affect the outcome of your bread․ Use warm water, not hot, as it can kill the yeast․
Once all your ingredients are measured and prepared, you’re ready to move on to the next step․
Step 2⁚ Adding Ingredients to the Bread Pan
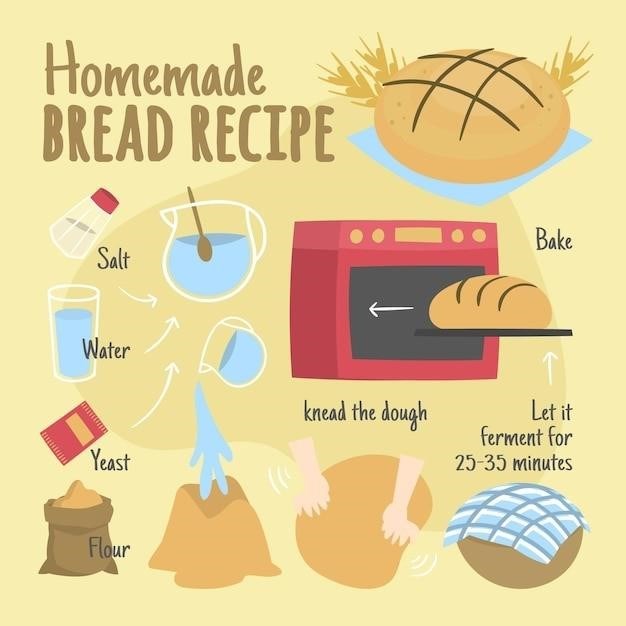
With your ingredients measured and ready, it’s time to load them into the bread pan of your Neretva Bread Maker․ The order in which you add the ingredients is crucial for optimal baking․ The general rule of thumb is to add the wet ingredients first, followed by the dry ingredients, and finally the yeast․
Start by pouring the liquid ingredients, such as water, milk, or oil, into the bread pan․ Next, add the dry ingredients, including flour, sugar, and salt․ Make sure to distribute them evenly across the bottom of the pan․ Finally, sprinkle the yeast on top of the dry ingredients․ Avoid mixing the yeast with the liquid ingredients as it can kill the yeast and hinder the fermentation process․
Once all the ingredients are in the bread pan, you’re ready to select the appropriate baking program and start the baking process․
Step 3⁚ Selecting the Baking Program
The Neretva Bread Maker offers a wide range of pre-programmed settings to cater to your baking preferences․ Each program is designed for a specific type of bread, with variations in baking time, kneading intensity, and temperature․ To choose the right program, consult the instruction manual or the recipe book that came with your machine․
For basic white bread, you’ll likely select the “Basic” or “White Bread” program․ If you’re making a denser loaf, like sourdough or rye bread, there’s a program for that․ The Neretva Bread Maker also features settings for specialty breads like gluten-free, French bread, and even dough for pizza or rolls․
Take your time to browse the available programs and select the one that aligns with the type of bread you’re making․ Once you’ve chosen the program, press the corresponding button on the control panel and move on to the next step․
Step 4⁚ Setting the Loaf Size and Crust Color
The Neretva Bread Maker allows you to customize the size and crust color of your loaf, giving you greater control over the final result․ Choose from three loaf sizes⁚ 1․5 lb, 2 lb, or 2․5 lb․ The machine will automatically adjust the baking time and dough consistency to accommodate your selected size․
For the crust, you have three options⁚ light, medium, or dark․ This setting determines the duration of the final baking stage, influencing the crust’s color and texture․ A lighter crust will be softer, while a darker crust will be more crispy․ Consider your personal preference and the type of bread you’re making when selecting the crust color․
These settings are typically adjusted using buttons on the control panel of the Neretva Bread Maker․ Refer to the user manual for precise instructions on navigating these options․ Once you’ve set the loaf size and crust color, you’re ready to begin the baking process․
Step 5⁚ Starting the Baking Process
With your ingredients added and settings selected, it’s time to start the baking process․ Press the “Start” button on your Neretva Bread Maker to initiate the cycle․ The machine will automatically handle the mixing, kneading, proofing, and baking stages, requiring minimal intervention from you․
During the baking process, the machine will go through several phases․ You’ll likely hear the motor running as the dough is mixed and kneaded․ You might also notice the machine’s internal temperature rising as the bread bakes․ The display on your Neretva Bread Maker should indicate the current stage of the baking process․
While the machine does most of the work, it’s helpful to keep an eye on the process․ You can monitor the progress through the viewing window on the lid․ Depending on your preferred crust color, you may need to adjust the baking time slightly․ The user manual provides specific guidelines for monitoring the baking process and making adjustments if necessary․
Step 6⁚ Enjoying Your Homemade Bread
Once the baking cycle is complete, your Neretva Bread Maker will signal the end with a beep or a light․ Let the bread cool in the pan for a few minutes before removing it․ Use the included paddle removal tool to gently lift the bread out of the pan․
While the bread is still warm, you can enjoy it as is, or you can slice it and spread it with butter, jam, or your favorite toppings․ The freshly baked bread will have a delicious aroma and a soft, fluffy texture․
If you want to store your bread for later, allow it to cool completely before placing it in an airtight container or freezer bag․ Frozen bread can be thawed at room temperature or in the refrigerator․ When reheating bread, you can toast it in a toaster or oven, or you can warm it up in a microwave․
Cleaning and Maintenance
Keeping your Neretva Bread Maker clean is essential for ensuring its longevity and preventing any unwanted odors or flavors from affecting your bread․ Here’s a simple guide to cleaning and maintaining your bread machine⁚
Unplug the machine before cleaning to prevent any electrical hazards․
Allow the machine to cool completely before attempting to clean it․
Remove the bread pan and kneading paddle․ Wash these components in warm, soapy water and dry them thoroughly․ You can use a soft brush to remove any stubborn residue․
Wipe the inside of the machine with a damp cloth․ Avoid using harsh cleaners or abrasive materials․
Clean the lid and viewing window with a damp cloth to remove any flour or crumbs․
Store the bread pan and kneading paddle in a dry place until the next use․
Keep the machine in a cool, dry place when not in use․
It’s also important to note that your Neretva Bread Maker may come with a specific cleaning guide in its user manual․ Be sure to refer to that guide for any additional cleaning instructions or recommendations․
Troubleshooting Tips
While the Neretva Bread Maker is designed for easy use, you may encounter some minor issues from time to time․ Here are some common troubleshooting tips to help you resolve those problems⁚
Bread not rising⁚ Ensure the yeast is fresh and active․ Check the temperature of the water, it should be warm but not hot․ Make sure you’ve added the correct amount of yeast and that it’s not clumped together․
Bread is dense and heavy⁚ This could be due to over-mixing the dough․ Check if you’ve added the correct amount of flour and water, and ensure the yeast is active․
Bread is unevenly baked⁚ Try adjusting the loaf size or crust color settings․ Ensure the bread pan is properly placed in the machine․
Bread is sticking to the pan⁚ Ensure the bread pan is properly greased․ You can also use parchment paper to prevent sticking․
Machine not working⁚ Check if the machine is plugged in and the power switch is on․ Try resetting the machine by unplugging it for a few minutes and then plugging it back in․ If the issue persists, consult the user manual or contact customer support․
Remember, if you’re still experiencing issues, consult the Neretva Bread Maker user manual for more detailed troubleshooting tips․ You can also find helpful information online on forums, community websites, and the manufacturer’s website․