Chicken tractor plans provide a comprehensive guide to building mobile coops, offering benefits like easy egg collection and pasture fertilization. These plans include step-by-step instructions, material lists, and customizable designs to suit various flock sizes and needs, making them ideal for backyard chicken keepers and small-scale farmers.
1.1 What is a Chicken Tractor?
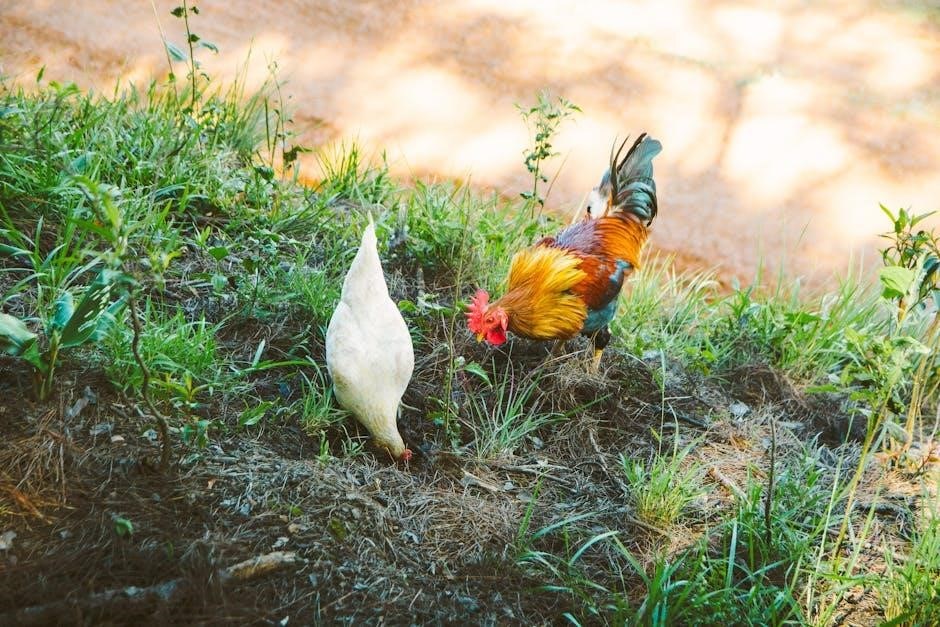
A chicken tractor is a mobile coop designed to house poultry while allowing them to graze on pasture. It typically features an open bottom for direct ground access, protecting chickens from predators and providing fresh forage. These structures are often lightweight and wheeled, making them easy to move across the yard. They are ideal for small-scale farming or backyard flocks, promoting healthy, free-range egg production and fertilizer distribution. Chicken tractors are versatile, adaptable, and eco-friendly, supporting sustainable poultry keeping practices.
1.2 Benefits of Using a Chicken Tractor
Using a chicken tractor offers numerous advantages, including improved pasture health through natural fertilization. It promotes healthy chickens by providing access to fresh air, sunlight, and bugs. The mobile design allows easy relocation, preventing overgrazing and reducing parasite buildup. Chicken tractors are cost-effective, as they eliminate the need for expensive feed and cleanup systems. They also offer predator protection and are customizable to fit various flock sizes and needs, making them a practical and sustainable option for backyard chicken keepers and small farmers alike.
1.3 Importance of Having a Plan
Having a detailed plan is crucial for building an effective chicken tractor. A well-designed plan ensures functionality, safety, and efficiency, helping you avoid costly mistakes. It outlines materials and labor needs, preventing wasted resources. A clear plan also ensures structural integrity and ease of mobility. Customization options are easier to implement with a solid plan in place. Additionally, it provides a materials list, helping you budget and prepare. A good plan guarantees your chicken tractor meets your flock’s needs and adheres to local regulations, ensuring long-term success and sustainability for your backyard farming project.
Types of Chicken Tractor Plans
Chicken tractor plans vary, offering designs for different needs. Popular types include Salatin-style, A-frame, hoop-style, and PVC pipe models, each with unique features and benefits.
2.1 Salatin Style Chicken Tractor Plans
Salatin-style chicken tractor plans, popularized by Joel Salatin, emphasize portability and efficiency. These designs typically feature lightweight, rectangular frames with open bottoms for direct grass access. They often include removable roofs, nesting boxes, and easy-access doors. Ideal for small to medium flocks, Salatin-style tractors promote healthy chicken movement and pasture fertilization. Plans usually specify durable materials like wood and metal, ensuring longevity. This design is eco-friendly, cost-effective, and perfect for farmers seeking sustainable poultry management solutions.
2.2 A-Frame Chicken Tractor Plans
A-Frame chicken tractor plans feature a triangular roof design, resembling a miniature house. This style offers excellent structural integrity and weather resistance. The sloped roof allows rain and snow to slide off easily, while the open bottom promotes healthy grazing. Typically built with wood or metal frames, A-Frame tractors are durable and easy to assemble. They provide ample ventilation and protection from predators, making them ideal for small backyard flocks. This design balances practicality and aesthetics, appealing to both novice and experienced farmers.
2.3 Hoop Style Chicken Tractor Plans
Hoop style chicken tractor plans are known for their simplicity and portability. Constructed with PVC pipes or metal hoops, these designs create a lightweight, arched frame covered with chicken wire or netting. The open-ended structure allows chickens to graze freely while protecting them from predators. Hoop tractors are easy to move and require minimal materials, making them a cost-effective option for small flocks. Their collapsible design also makes them ideal for seasonal or temporary use, offering flexibility for backyard farmers.
2.4 PVC Pipe Chicken Tractor Plans
PVC pipe chicken tractor plans offer a lightweight and affordable solution for backyard farmers. These designs utilize PVC pipes to create a sturdy yet portable frame, often covered with chicken wire or netting. PVC tractors are easy to assemble and customize, making them ideal for small flocks. Their lightweight design allows for easy movement, ensuring chickens have fresh grazing areas. PVC pipe plans are budget-friendly and perfect for those seeking a low-cost, durable chicken tractor option;
Essential Components of a Chicken Tractor
A chicken tractor requires a sturdy frame, nesting boxes, ventilation, feeders, waterers, and wheels for mobility. These components ensure functionality and comfort for the chickens.
3.1 Frame and Structural Integrity
The frame is the backbone of a chicken tractor, providing stability and support. Typically made of wood or metal, it must be durable to withstand weather and animal activity. A sturdy frame ensures the tractor can be moved easily while protecting the chickens inside. Proper construction techniques, such as using weather-resistant materials and reinforcing joints, are essential. A low center of gravity enhances stability, preventing tipping; Ensure the frame is proportionate to the size of the tractor and the number of chickens it will house. Regular inspections are crucial to maintain structural integrity and safety.
3.2 Nesting Boxes and Egg Collection
Nesting boxes are a crucial feature of chicken tractors, designed to provide hens with a safe, comfortable space for laying eggs. Typically, one box per 3-4 hens is recommended. Boxes should be easy to access for both the hens and for egg collection. A sloped roof or removable lid can facilitate egg gathering. Ensure the boxes are well-ventilated and kept clean to encourage healthy egg production. Positioning them away from drafts and predators is essential. Regular cleaning and maintenance will help prevent disease and keep the eggs clean. Proper nesting box design enhances efficiency and hygiene, making egg collection a breeze for backyard farmers.
3.3 Ventilation and Lighting
Ventilation and lighting are vital for maintaining a healthy environment in a chicken tractor. Proper airflow prevents ammonia buildup and ensures fresh air for the chickens. Windows or mesh panels are essential for ventilation. Natural lighting during the day promotes egg production, while controlled artificial lighting can extend daylight hours. Adequate lighting and ventilation reduce stress and contribute to the overall well-being of the flock effectively.
3.4 Feeders and Waterers
Feeders and waterers are crucial for the chickens’ daily needs. Trough feeders or hanging feeders are popular options, ensuring easy access to feed while minimizing waste. Waterers should be durable and designed to prevent spills, with options like nipple systems or gravity-fed dispensers. Proper placement and size of feeders and waterers ensure all chickens can eat and drink comfortably. Regular cleaning of these components is essential to maintain hygiene and prevent bacterial growth, keeping the flock healthy and thriving.
3.5 Wheels and Mobility Features
Wheels and mobility features are essential for moving the chicken tractor effortlessly. Heavy-duty wheels with sturdy axles ensure smooth movement across various terrains. Handles attached to the frame make maneuvering easier, especially for larger structures. Wheel size and placement should be considered for optimal stability and ease of use. Additional features like brakes or locking mechanisms can prevent unintended movement, ensuring the tractor stays in place when needed. Properly designed wheels enhance functionality and durability, making the tractor more practical for daily use and flock management.
Materials and Tools Needed
Materials needed include durable lumber, metal framing, and hardware. Essential tools are saws, drills, and measuring tools. Ensure all components are weather-resistant for outdoor longevity.
4.1 Lumber and Plywood Requirements
For a sturdy chicken tractor, use pressure-treated or rot-resistant lumber for the frame. Opt for 2x4s for the base and 2x2s for nesting boxes. Plywood (1/2-inch thick) is ideal for flooring, while 1/4-inch plywood works for walls. Ensure all wood is weatherproofed to withstand outdoor conditions. Properly measure and cut the lumber according to your plan’s specifications. Consider using eco-friendly, sustainable wood options if available. Always check for warping or damage before assembling to ensure structural integrity and longevity of your chicken tractor.
4.2 Metal and Hardware Components
Metal components like hinges, brackets, and wire mesh are essential for durability and security. Use galvanized or stainless steel hardware to resist rust. Hinges are crucial for doors and nesting box lids, while brackets provide structural support. Wire mesh ensures ventilation and protects chickens from predators. Select durable screws, bolts, and latches to secure all parts. Always pre-drill holes to prevent splitting wood. Proper hardware ensures the tractor remains sturdy and functional, safeguarding your flock and extending the structure’s lifespan.
4.3 Fasteners and Adhesives
Quality fasteners and adhesives are vital for a sturdy chicken tractor. Use galvanized screws, nails, or bolts to prevent rust and ensure durability. Wood glue is ideal for bonding lumber, while weatherproof adhesives like silicone sealant can protect gaps. Nails or screws with wide heads are best for securing wire mesh. Proper fastening ensures structural integrity, prevents predator entry, and withstands outdoor conditions. Choose rust-resistant options to maintain longevity and safety for your flock. These elements are crucial for a secure and weather-tight build.
4.4 Essential Tools for Assembly
Assembling a chicken tractor requires basic tools to ensure a smooth process. A cordless drill, screwdriver, and wrench are must-haves for securing bolts and screws. A saw (circular or handheld) is needed for cutting lumber to size. Measuring tape and a square help ensure accurate cuts and proper alignment. Pliers and a hammer may also come in handy. Safety gear like gloves and goggles is recommended; Optional tools include an impact driver or miter saw for precision cuts. Clamps can help hold pieces in place during assembly. Having these tools ready will streamline the building process.
Step-by-Step Building Guide
A step-by-step guide ensures a smooth process. Start with a plan, prepare materials, and assemble the frame. Install the roof, add nesting boxes, attach wheels, and finish with final touches.
5.1 Preparing the Frame
Begin by gathering all lumber and hardware. Cut the frame pieces to the specified dimensions using a saw. Assemble the base and sides, ensuring squareness for stability. Use screws or nails for secure joints. Double-check measurements to match your plan. Sand rough edges for safety. This step is crucial for the structural integrity of your chicken tractor, providing a solid foundation for the rest of the build.
5.2 Installing the Roof and Sides
Attach the roof panels to the frame, ensuring a snug fit for weather protection. Secure with hinges for easy access. Install side panels, leaving space for ventilation. Use wire mesh or hardware cloth to cover openings, preventing predators. Align edges carefully and fasten with screws. Double-check for gaps to ensure durability and safety. This step completes the structural envelope, ready for adding nesting boxes and doors in the next phase of construction.
5.3 Adding Nesting Boxes and Doors
Install nesting boxes inside the chicken tractor, typically one box per 3-4 hens. Each box should be around 12×12 inches in size. Attach them securely to the frame using screws or nails. Add doors to the boxes for easy egg collection. Ensure the doors are wide enough for hens to enter comfortably. Attach hinges and latches to the doors for secure closure. Finally, add bedding material like straw or pine shavings to the boxes for comfort and cleanliness. A small roof overhang can protect the doors from rain.
5.4 Attaching Wheels and Handles
Attach sturdy wheels to the base of the chicken tractor to ensure easy mobility. Secure them with bolts or brackets, ensuring they can handle the weight. Position the wheels under the frame for balance. Add handles on both ends for easy pulling. Use durable materials like metal brackets to attach the handles. Ensure the tractor moves smoothly and evenly. Check the alignment of wheels and handles to avoid wobbling. This step is crucial for the tractor’s portability and functionality. Secure all parts tightly to prevent loose components over time.

5.5 Final Assembly and Touch-ups
Complete the assembly by ensuring all components are securely fastened. Sand rough edges for safety. Apply a waterproof finish or sealant to protect the tractor from weather. Inspect for gaps or holes and fill them with durable sealants. Check hardware for tightness. Allow paint or stain to dry fully before introducing chickens. Perform a final inspection to ensure structural integrity and functionality. Make any necessary adjustments for optimal performance. This step ensures the tractor is safe, durable, and ready for use.
Customizing Your Chicken Tractor
Customize your chicken tractor to meet specific needs by adjusting features like size, ventilation, or adding unique elements such as automatic doors or extra storage compartments.
6.1 Adjusting Size for Different Flock Sizes
Adjusting the size of your chicken tractor ensures it suits your flock’s needs. Measure your chickens and calculate space requirements, typically 2-4 square feet per bird inside. Scale the frame, roof, and sides proportionally to maintain structural integrity. For larger flocks, extend the length or width, while smaller flocks may require a more compact design. Consider adding or removing sections to tailor the tractor to your flock size. Ensure mobility remains manageable when resizing the structure.
6.2 Adding Extra Features
Enhance your chicken tractor with extra features to improve functionality and convenience. Consider adding automatic feeders and waterers to reduce daily maintenance. Install solar-powered lighting for better visibility and ventilation. Incorporate shelves or trays for easy egg collection. Add insulation for colder climates or shade cloth for warmer weather. You can also include removable trays for easy cleaning or adjustable roosts for different chicken sizes. These enhancements make the tractor more versatile and user-friendly, ensuring optimal comfort for your flock and ease of use for you.
6.3 Weatherproofing and Insulation
Weatherproofing and insulation are crucial for protecting your chicken tractor from extreme temperatures and moisture. Use waterproof materials like metal or PVC roofing to shield from rain. Line the interior with insulating bedding such as straw or wood shavings. Add weatherstripping to seal gaps and prevent drafts. For colder climates, install removable insulation panels or tarps. In warmer areas, incorporate shade cloth or ventilation windows to regulate heat. These modifications ensure a stable environment, keeping your flock comfortable year-round.
Free Chicken Tractor Plans and Resources
Explore free chicken tractor plans and resources online, including downloadable PDF guides, DIY tutorials, and community forums, to help you build efficiently and cost-effectively.
7.1 Where to Find Free PDF Plans
Find free chicken tractor plans in PDF format on websites like Pinterest, Google, and farming forums. Many DIY enthusiasts share detailed designs online. These plans often include measurements, material lists, and step-by-step instructions. You can also search for “chicken tractor plans PDF” on search engines to discover downloadable guides. Additionally, some agricultural blogs and homesteading websites offer free blueprints. Ensure the plans align with your needs and local building regulations before starting your project.
7.2 Recommended Books and Guides
For comprehensive guidance, consider books like “The Chicken Tractor: The Permaculture Guide to Hajja and Chicken Tractors” by Andy Lee and Patricia Foreman. These resources provide detailed diagrams, construction tips, and practical advice for building and maintaining chicken tractors. Many guides also cover flock management and optimization. Check online marketplaces or libraries for these titles. Additionally, look for eBooks and downloadable guides that focus on sustainable poultry farming and DIY projects, offering step-by-step instructions for various chicken tractor designs.
7.3 Online Communities and Forums
Online communities and forums are invaluable resources for finding and sharing chicken tractor plans. Websites like Reddit’s r/chickentractors and r/permaculture offer extensive discussions and downloadable PDFs. Facebook groups dedicated to backyard farming often share DIY guides and tips. Forums like BackYardChickens and Homesteading Forum provide platforms for builders to exchange ideas and troubleshoot issues. These communities are great for connecting with experienced builders and accessing a wealth of free or low-cost resources to refine your project.
Tips for Beginners
Start small and prioritize functionality over complexity. Choose simple plans that align with your skill level and resources. Budget wisely by repurposing materials when possible.
8.1 Choosing the Right Plan
Select a plan that matches your experience and flock size. Consider the number of chickens, available space, and local climate. Ensure the design is practical and durable.
Review materials and tools required. Opt for plans with clear instructions and diagrams. Join online forums for feedback and advice to avoid costly mistakes.
8.2 Managing Costs and Budget
Set a realistic budget and prioritize essential features. Reuse or repurpose materials to reduce expenses. Compare prices for lumber, hardware, and tools to find cost-effective options. Consider DIY solutions for feeders and nest boxes to save money. Avoid unnecessary upgrades that may inflate costs. Plan carefully to minimize waste and ensure materials are used efficiently. Stick to your budget while maintaining the tractor’s functionality and durability for your flock.
8.3 Avoiding Common Mistakes
Avoid common mistakes by ensuring proper ventilation and spacing for your flock. Overcomplicating the design can lead to structural issues. Measure twice and cut once to avoid wasted materials. Don’t underestimate the importance of durable materials for withstanding outdoor conditions. Keep the design simple for easy mobility. Plan for adequate nesting boxes and access points. Research local regulations to ensure compliance. Test the tractor on a small scale before full implementation to identify and fix potential flaws early.
Advanced Techniques and Modifications
Explore advanced techniques like automating feeders and waterers, adding solar power for lighting, and integrating with farm systems for a more efficient and sustainable setup.
9.1 Automating Feeders and Waterers
Automating feeders and waterers enhances efficiency and reduces labor in chicken tractor maintenance. Timed feed dispensers ensure consistent feeding schedules, minimizing waste and stress on birds. Automatic waterers with sensors or float valves maintain clean water levels, preventing contamination; These systems are especially beneficial for large flocks or busy farmers. Automation can be achieved with simple DIY solutions or purchased kits, integrating seamlessly into your chicken tractor design. This modern approach promotes healthier chickens and a more sustainable poultry-keeping experience.
9.2 Adding Solar Power and Lighting
Adding solar power and lighting to your chicken tractor can significantly enhance its functionality. Solar panels can be installed to provide a renewable energy source, powering lights, feeders, and other accessories. LED lights are ideal for low-light conditions, ensuring chickens remain active and productive. Automation can regulate lighting schedules, optimizing egg production. This eco-friendly approach reduces electricity costs and ensures reliability. Consider integrating solar charging systems and energy-efficient solutions to create a sustainable and modern chicken tractor setup for your flock.
9.3 Integrating with Other Farm Systems
Integrating your chicken tractor with other farm systems can enhance efficiency and sustainability. For example, connecting it to a composting system allows chicken manure to fertilize crops. You can also link it to hydroponic or aquaponic setups, where waste nutrients feed plants or fish. Additionally, incorporating it into a rotational grazing system optimizes pasture use and reduces overgrazing. This holistic approach promotes a balanced ecosystem, maximizing resource utilization and minimizing waste. It’s a practical way to create a self-sustaining farm environment.
Maintenance and Upkeep
Regular cleaning and sanitizing are crucial to keep the chicken tractor hygienic and functional. Check for wear and tear, and repair damaged parts promptly. Seasonal adjustments, like adding insulation or ventilation, ensure optimal conditions for your flock.
10.1 Cleaning and Sanitizing
Regular cleaning and sanitizing are crucial for maintaining a healthy environment in your chicken tractor. Start by removing soiled bedding and droppings, then rinse the interior with water. Use a mild detergent or vinegar solution to scrub surfaces, paying attention to nesting boxes and feeders. Disinfect with a pet-safe sanitizer to eliminate bacteria and pests. Allow the tractor to dry completely before adding fresh bedding. Regular cleaning prevents disease outbreaks and keeps your flock thriving.
- Remove and replace bedding material.
- Scrub all surfaces with a mild detergent;
- Disinfect with a pet-safe sanitizer.
- Ensure the tractor is dry before reuse.
Wear gloves and a mask for protection during the process.
10.2 Repairing and Replacing Parts
Regular inspections are crucial to identify worn-out or damaged components in your chicken tractor. Common replacements include wheels, door hinges, and wire mesh. Keep spare hardware and materials on hand to address issues promptly. For wooden parts, sand and repaint to prevent rot. Metal components may need rust-proofing. Replace bedding regularly to maintain hygiene. Addressing repairs early ensures the tractor remains safe and functional for your flock. Proper maintenance extends the lifespan of your chicken tractor.
10.3 Seasonal Adjustments
Seasonal adjustments are crucial for maintaining the efficiency and comfort of your chicken tractor. During summer, ensure proper ventilation by adding extra windows or shading to prevent overheating. In winter, insulate the tractor with straw or cover it with tarps to retain heat. Spring and fall require regular cleaning and preparing the tractor for new layers of bedding. Adjust the roof angle to accommodate snow in colder climates. These modifications ensure your flock stays healthy and productive year-round.
Building a chicken tractor is a rewarding project. With a chicken tractor plans PDF, you can create a cost-effective, mobile shelter for your flock. Start today!
11.1 Final Thoughts on Building a Chicken Tractor
Building a chicken tractor is a rewarding project that enhances sustainability and efficiency in raising poultry. By following detailed plans, you can create a structure that promotes healthy chickens and reduces maintenance. Remember to prioritize durability, ventilation, and mobility. Customization allows you to tailor the tractor to your specific needs, ensuring optimal performance. With patience and proper execution, your chicken tractor will become a valuable asset for your backyard flock, supporting both productivity and animal well-being. Start your project today and enjoy the benefits of this innovative system!
11.2 Encouragement to Start Your Project
Starting your chicken tractor project is an exciting step toward sustainable living and fresh eggs. With the right chicken tractor plans PDF, you can confidently begin building, even if you’re new to DIY projects. Remember, every small step brings you closer to enjoying the benefits of raising chickens. Don’t hesitate—gather your tools, follow the guide, and watch your project come to life; The sense of accomplishment and fresh eggs will make every effort worthwhile!